
Molly writes...
When we talk about the Eight Steps of the Zentangle Method we often talk about the concept of The Elegance of Limits. This concept was integral in the development of the method and its eight steps. It was important to Rick and Maria to create a structure that nurtured and guided creativity with subtle suggestion, but also allowed room for artistic exploration. The Zentangle Primer Vol 1 describes “the elegance of limits” as a supportive matrix that paradoxically inspires creativity with gentle boundaries and limited options. Let’s take a closer look at the Eight Steps; how they offer us an “elegance of limits” in creativity.
- Gratitude and Appreciation: Get comfortable. Take a deep breath. Honor a moment for gratitude and appreciation. For the time, for the ability, for the materials, for yourself, for others, for art or for anything else. This step is one that can easily be forgotten, but one that we also encourage folks make time for. Even the briefest pause to acknowledge gratitude can completely shift the energy for the time ahead. Gratitude fuels a positive outlook and allows us to feel more confident in ourselves. Shifting our focus to what we are grateful for in our lives, shifts the focus to seeing the beauty in our world. Some might say you find what you are looking for.
- Corner Dots: With your pencil, lightly draw a dot in each of the four corners of your tile. This step may seem like a minor role in the greater scheme, but it’s actually a bold and courageous step for the artist behind the experience. Putting down that first mark can be intimidating. Easing into it this way can take away any hesitation or doubt about how to begin.
- Border: With your pencil, lightly draw a line that connects the four dots to create a border. This step allows you to continue on immediately. Knowing the next step and being able to focus in on that step only. This step brings visual structure to your work. You have something to build on.
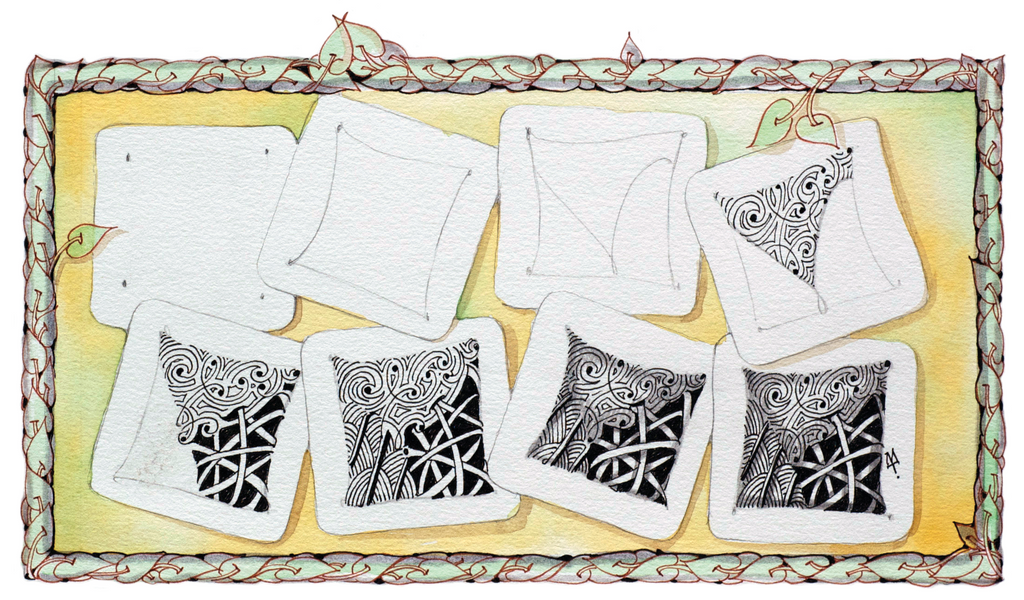
- String: With your pencil, lightly draw a line or lines that divides the tile into sections. The string could win coach of the year, best director, unsung hero and most inspirational speaker. Strings set the stage. They surround, support, and hold your tangles as they grow into an artistic composition. We often say that the string in Zentangle is a suggestion not a demand. It is also a mentor, a cheerleader, and a support team. Your string will guide you and inform you, and it will also offer options. You don’t have to think or plan. You can simply focus on tangling.
- Tangle: With your pen, draw “tangles” in the sections created by your string. As you begin your journey with ink, you only have to focus on one tangle at a time. And once you decide what tangle, you only have to focus on one stroke of that tangle. Let each stroke be your focus and then allow it to guide and direct your next stroke. Breathe and take your time as you draw.
- Shade: With your pencil and tortillon, add shades of gray to create dimension and depth. Shading is time for finish work. A time to revisit all of the inked lines you put down and to bring it all to life. Shading can completely change the work by sculpting and fine tuning the art.
- Initial and Sign: With your pen, put your initials on the front of your tile and sign and date the back of your tile. Confidently connecting the artist to the art is so important. Be proud of the artist within you!
- Appreciate: Take a moment to admire your work. Turn your tile this way and that. Reflect on the opportunity. If you are creating along with others, put your tiles together and appreciate the mosaic which they form. Finishing your practice, the way you began brings beautiful symmetry to the experience. Taking a moment to appreciate the work you have created, and perhaps the others you are with, is powerful. Acknowledging gratitude for the time and the opportunity empowers you and your art.
I love that over time artists of our amazing community have contributed to growing and evolving this art form we call the Zentangle Method. However, we have continued to embrace and honor these Eight Steps as an important part of our roots. As we sit back and watch the beauty of so many artists spreading their wings and exploring life and art in a creative way, we know that these simple eight steps played a role in the beginning of so many Zentangle journeys. We encourage you too to spread your wings, but know that these eight basic steps are always there when you need them.
With Gratitude and Appreciation,
Molly
--- + ---
Thank you to everyone who shared what the Zentangle Method has taught them in our last blog. We have randomly selected Carol Johns to receive a very special Zentangle surprise!
Tell us in the comments below what your favorite step of the Zentangle Method is and we will pick another commenter at random to receive a Zentangle surprise (not yet available in the Zentangle store!).
I like the whole process because it puts me into a sustained state of relaxed focused awareness. When I finish a tile, I feel like I am surfacing from a very peaceful place.
Leslie Hancock on
Step 6 Shade — here is where my tiles transform and bring me joy
Bette Abdu on
Carol Roenbaugh on
Do Mi Stauber on
Linda M Dochter, CZT 16 on
The best part for me is Step 5, Tangle. It’s a challenge for me, too! Slow down. Breathe. Take it one line at a time. When I focus on those aspects of tangling, I relax, my mind stops whirring, and I emerge later with a work of art. It is always a surprise in the end. I love Zentangle &what tangling has brought to me this past year. I want everyone to experience it!
Lucinda Mathews on
Sue Zanker on
My favorite steps are dots and border and how the paper is nog staring at you anymore after that
Jessica Remmé on
Vivian on
Rimona Gale on
I love 1+6.
Once I forgot step 1 and my students were very sad
Miriam on
I must admit that I enjoy each step of the Zentangle process, but the one that I most look forward to is the process of shading. Often, during the creation process, critical thinking sneaks in and I’m wondering if the end product is even worth saving. Then comes the shading step! Shading is that “surprise element” that brings depth and life to our efforts! It’s where the magic happens and I fall in love with Zentangle all over again! It happens every single time!
Bonnie Johnson on
Sue on
Jessica Dykes on
For the past many years my teaching of the Zentangle method has taken me down many rabbit holes. I loved sharing Zentangle Inspired Art and the many forms that it has taken. The Pandemic has brought about a change in my focus. I felt the urge to go back to the basics and start again. I have collected all of the Zentangle Project Packs and am currently going thru each one. Starting with PP#1 and enjoying the process of this meditative art form…just for myself. Beginning with the Ceremony and step #1…Appreciation
Lois Stokes on
Vickie L Stamper on
Susan Goodman on
Susan Goodman on
Janet on
My favorite step is the tangling. It is where I get the most Zenflow!
Melissa Flores on
While I appreciate all the steps, my favourite has to be initial and sign. When I am putting my initials on the piece, mostly I cannot believe I have done such a wonderful piece of art. Zentangle has the ability to make us all artists, but still I don’t believe it. I sign and date on the other side and list the tangles so I won’t forget the names. This makes me very happy. I have done over 100 Tangles in the past 100 days and they all make me so happy and have given me the chance to initial my art.
Sue Bellefeuille on
Missy Ross, CZT #36
Missy Ross on
Thanks for the refresher on the 8 Step Method, Molly 🙏
In my daily online sessions, I conduct every session using the 8 Steps. We start the session with a moment to think of something we can be thankful for or grateful for before laying down the corner dots. My favourite step is the third step, where we connect the dots. I encourage my students to trust the process and consider creating lines that are extraordinary, the connecting lines do not have to be rigid and straight. In doing so, it creates an extra element of surprise when the piece is finally complete. I love surprises 😁☘️
Angelina Arcari on
Lori Riden, CZT37 on
Kathleen Olivier on